

How To Create Project In Xcode
Table of Contents
When you create a new project in Xcode, the default boilerplate includes the Main.storyboard. If you are going with a no storyboard approach and want to set everything up in code, there are a few steps you need to do.

Learn the most up-to-date techniques and strategies for testing new and legacy Swift code in this free practical course for iOS devs who want to become complete Senior iOS Developers.
Save your spot now!
Sponsor sarunw.com and reach thousands of iOS developers.
Pre Xcode 11
Everyone should be on Xcode 11 by now, but I will add this here for completeness.
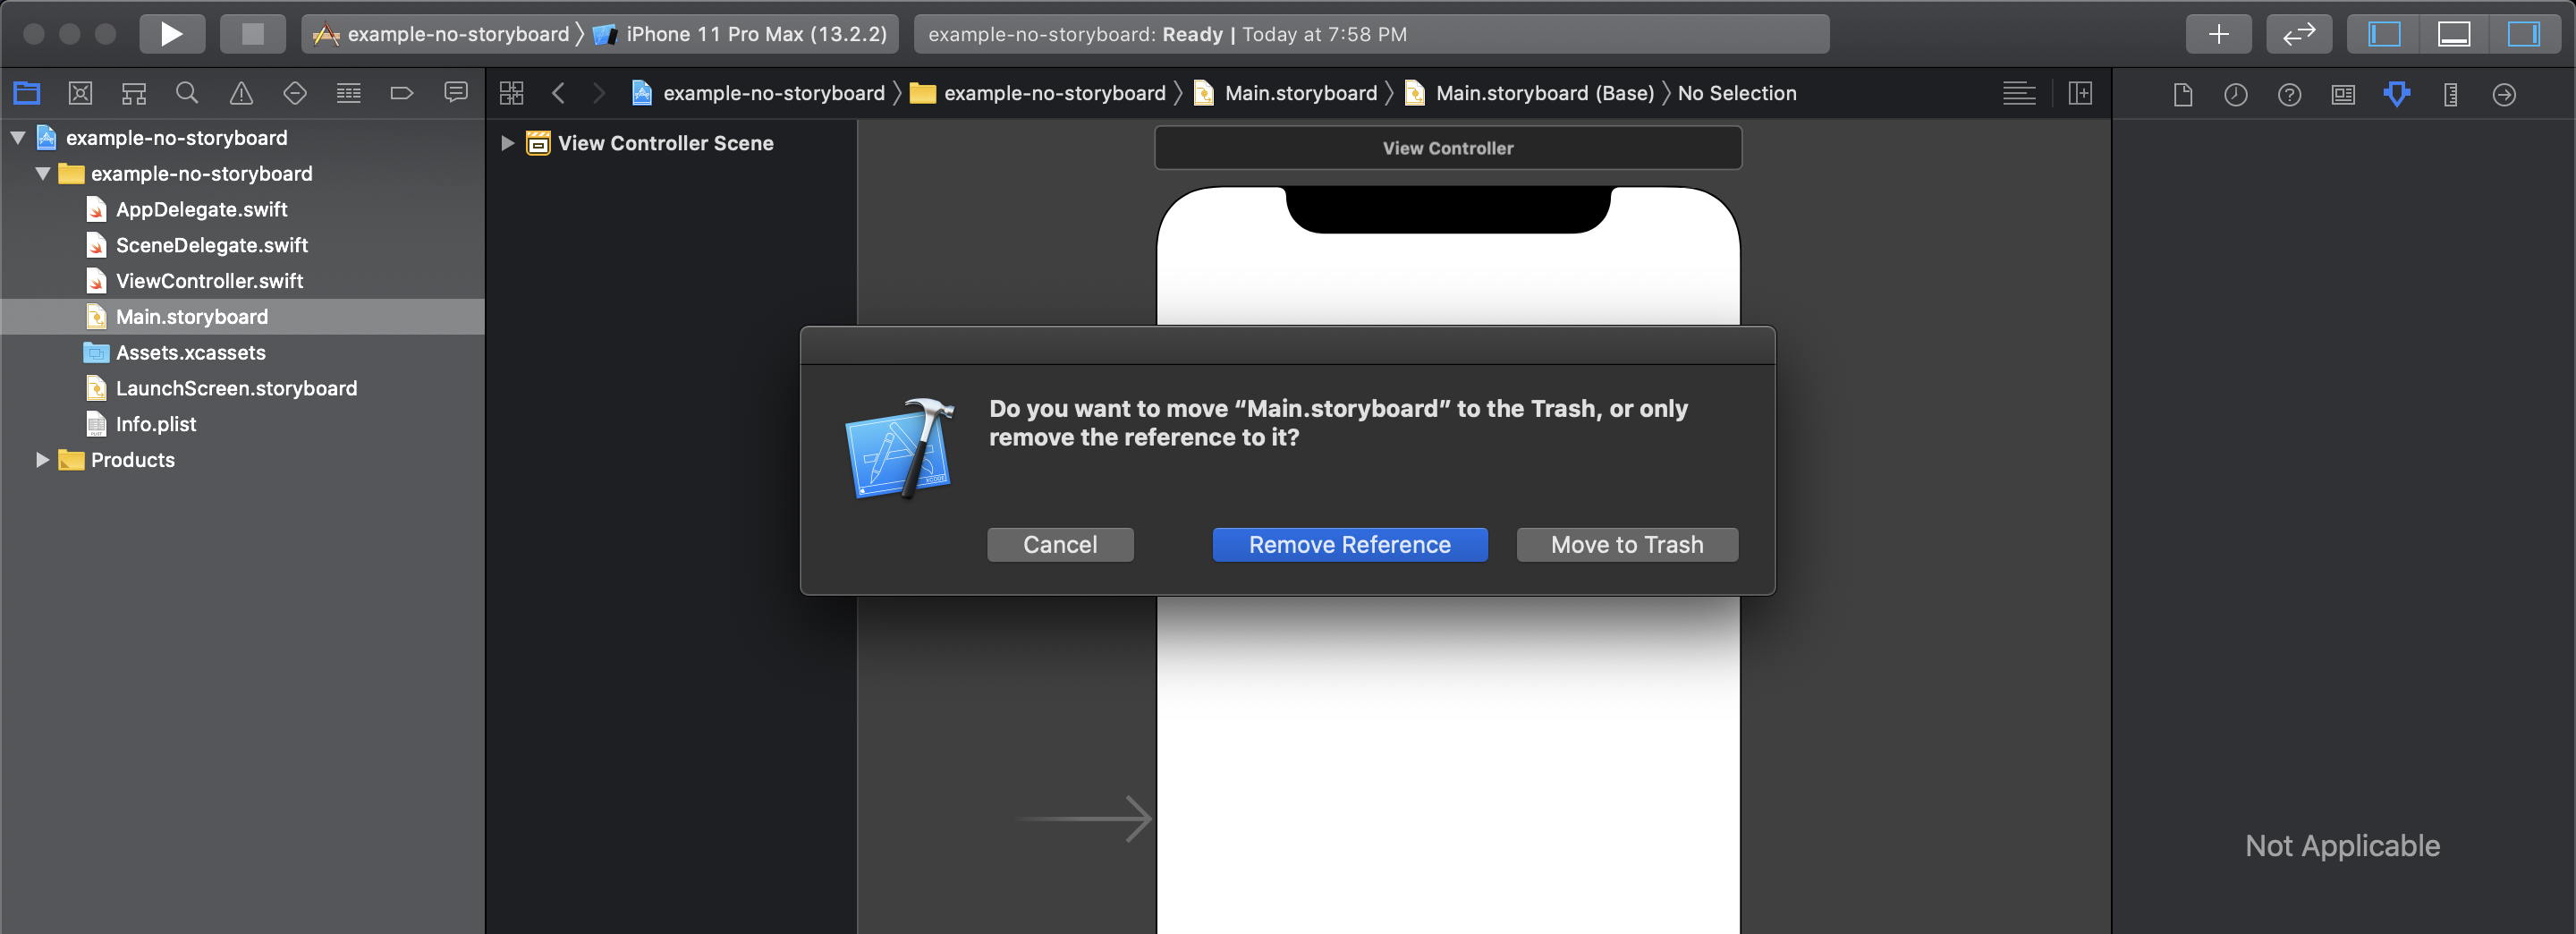
Remove Main.storyboard
Delete Main.storyboard file and make sure you select "Move to trash" option to remove it completely.
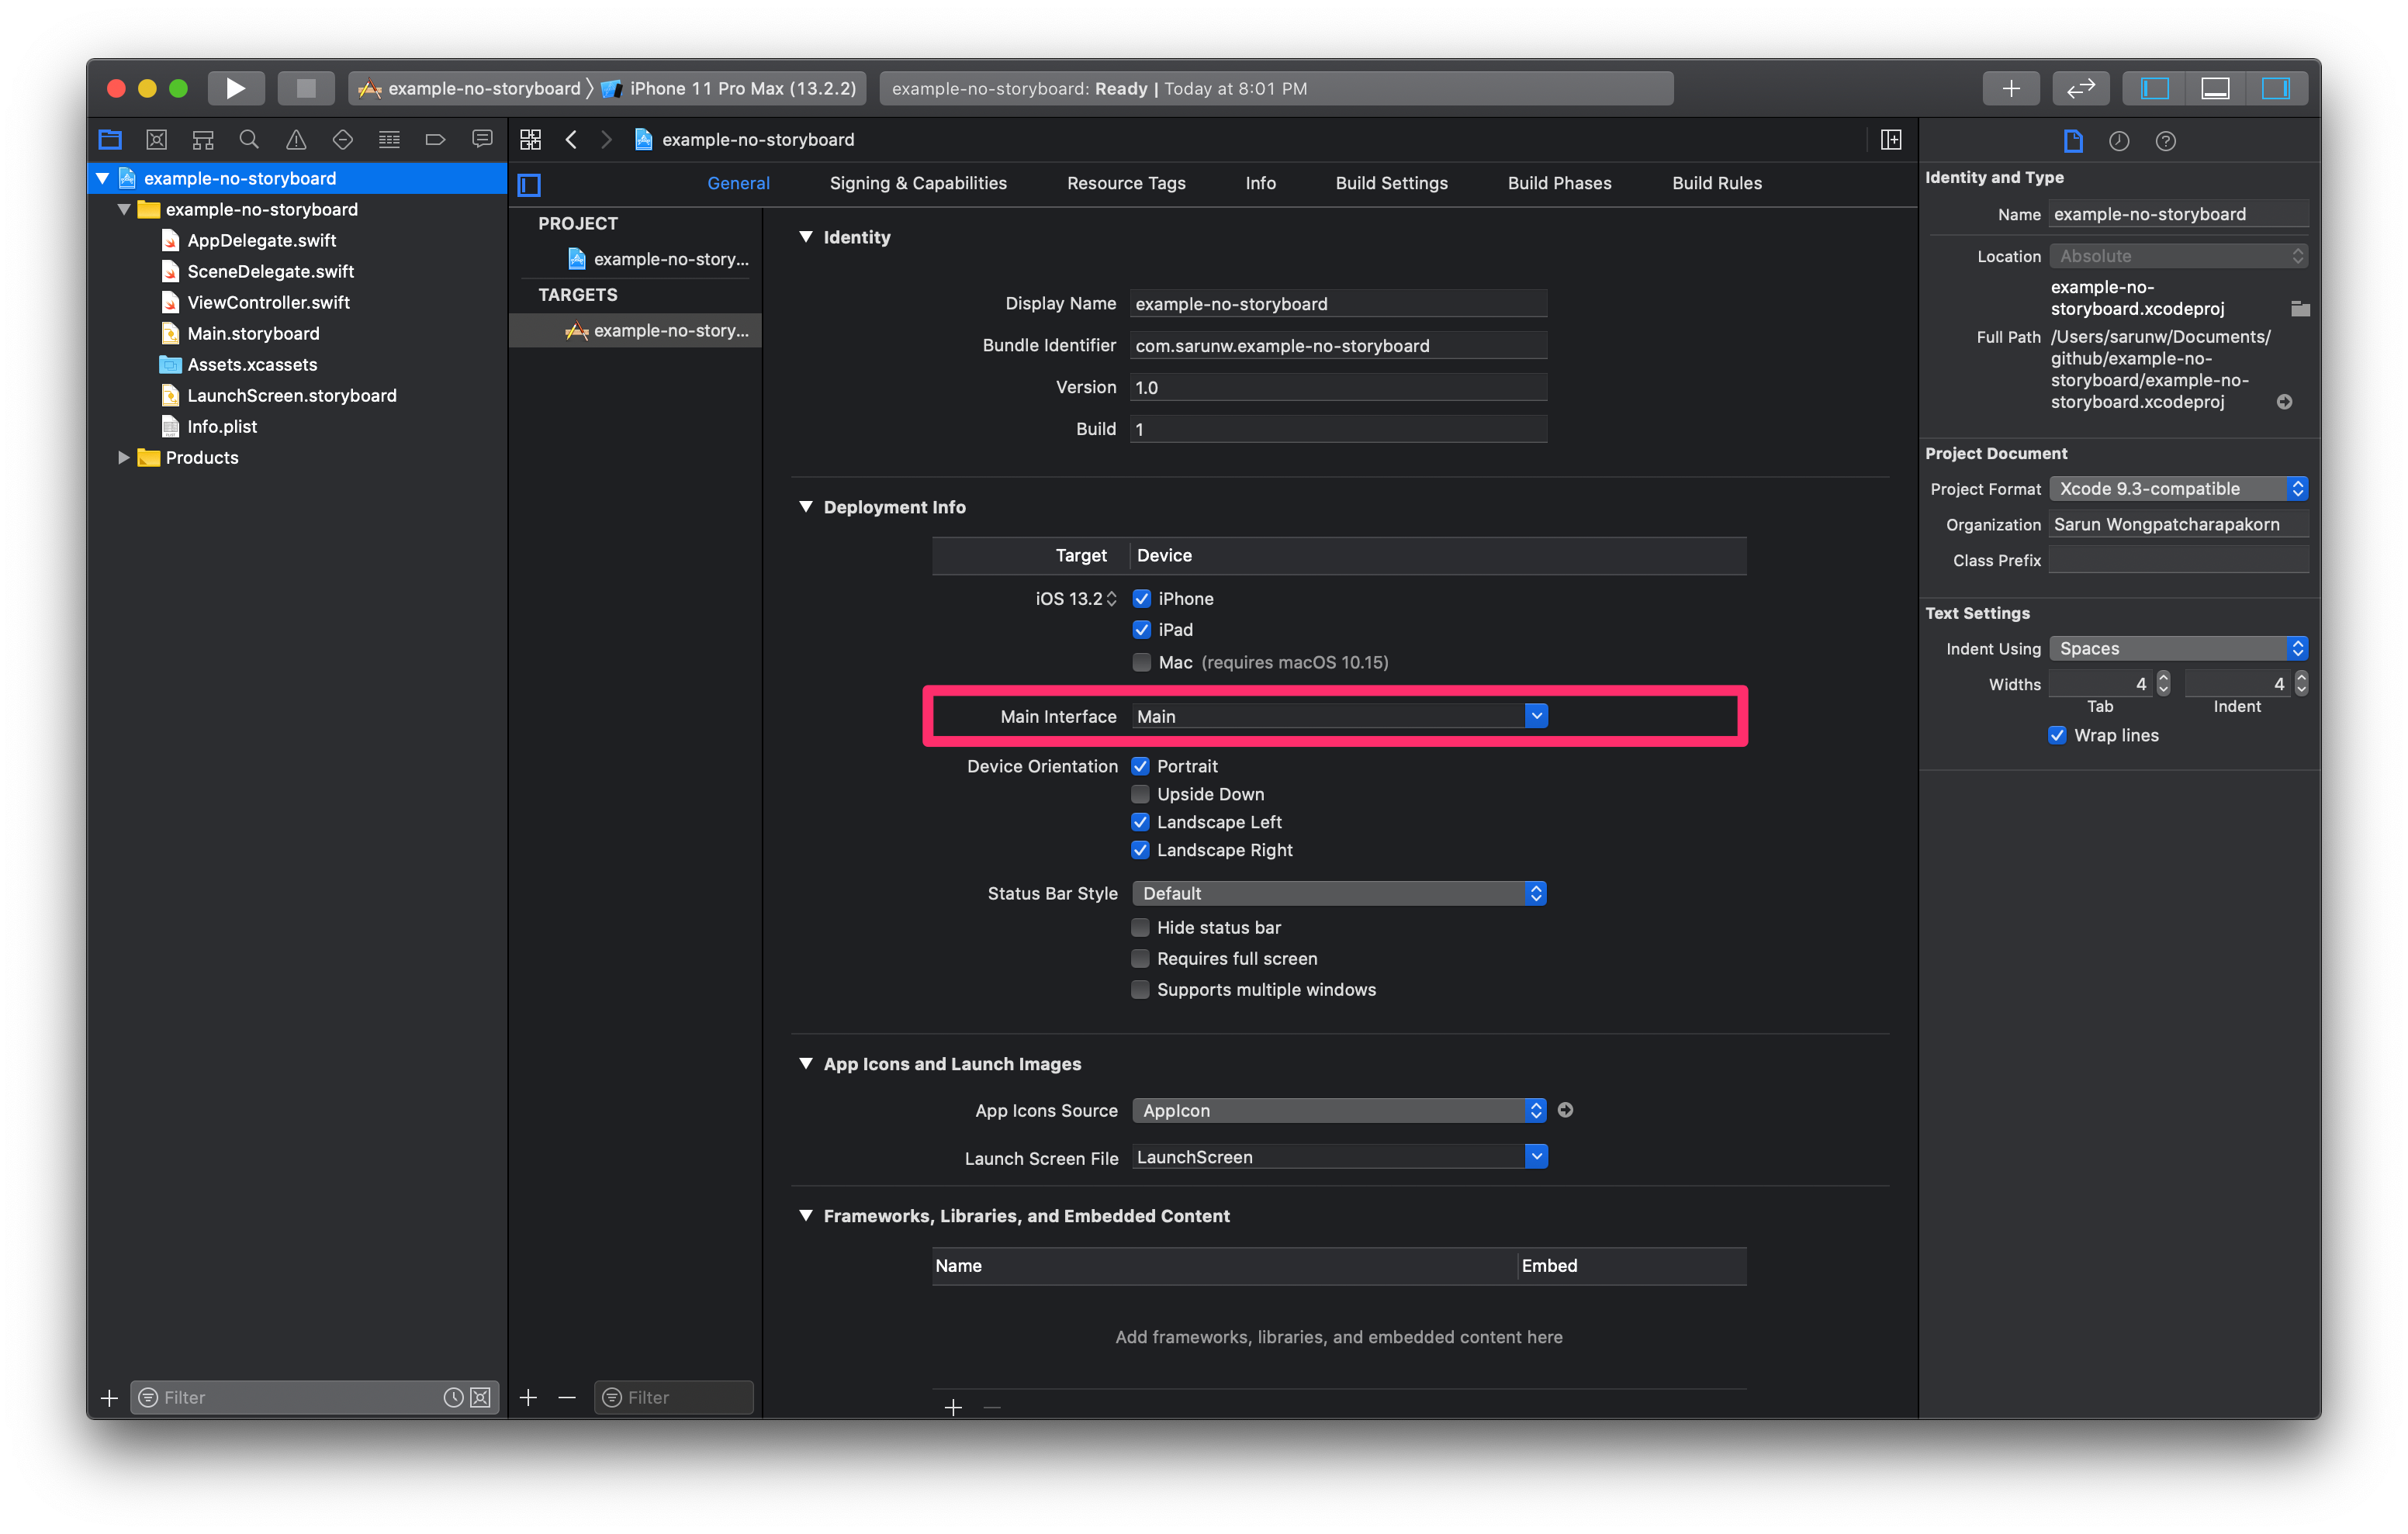
Remove reference to Main.storyboard
- Click on your project root level on the left panel
- Select your app target
- Click General tab
- Under Deployment Info section you will find Main Interface field
- Delete "Main" and leave it blank
Create the main window
If the application has a Storyboard set as the Main Interface, the window property will automatically be initialized, and its root view controller is set to the storyboard's initial view controller. Since we already removed it, we need to initialize window and set rootViewController manually. In pre Xcode 11, we do this in appDelegate.
                                    func              application              (              _              application:              UIApplication              ,              didFinishLaunchingWithOptions launchOptions:              [              UIApplicationLaunchOptionsKey              :              Any              ]              ?              )              -              >              Bool              {
                          let              window              =              UIWindow              (frame:              UIScreen              .main.bounds)
                          window.rootViewController              =              ViewController              (              )              // Your initial view controller.
                          window.              makeKeyAndVisible              (              )
                          self              .window              =              window
                          return              true
                          }
That's all.
Xcode 11
To support multiple windows in iOS 13, Xcode 11 boilerplate is a little bit different than in Xcode 10. The most noticeable change is the introduction of the new SceneDelegate.
Remove Main.storyboard
The first step is the same, delete Main.storyboard file and make sure you select "Move to trash" option to completely remove it.
Remove reference to Main.storyboard from Deployment Info
- Click on your project root level on the left panel
- Select your app target
- Click General tab
- Under Deployment Info section you will find Main Interface field
- Delete "Main" and leave it blank
Remove new Info.plist key-value, UISceneStoryboardFile
Removing "Main" from Main Interface is not enough (I think this might be a bug), you have to delete another reference to Main.storyboard hidden inside Info.plist
Open your Info.plist
- Click the arrow at the leftmost of Application Scene Manifest (
UIApplicationSceneManifest) key to expand - Click the arrow at the leftmost of Scene Configuration (
UISceneConfigurations) key to expand - Click the arrow at the leftmost of Application Session Role (
UIWindowSceneSessionRoleApplication) key to expand - Click the arrow at the leftmost of First Item (
Item 0) key to expand - Remove the key Storyboard Name (
UISceneStoryboardFile)

If you want to do it in your text editor, search for UISceneStoryboardFile and remove both key and value.
                                    <key>              UISceneStoryboardFile              <              /key>
                          <string>              Main              <              /string>
Create the main window
Just like in Xcode 10, we need to initialize window and set rootViewController manually. This time we do it in SceneDelegate.
From this:
                                    func              scene              (              _              scene:              UIScene              ,              willConnectTo session:              UISceneSession              ,              options connectionOptions:              UIScene              .              ConnectionOptions              )              {
                          guard              let              _              =              (scene              as              ?              UIWindowScene              )              else              {              return              }
                          }
To this:
                                    func              scene              (              _              scene:              UIScene              ,              willConnectTo session:              UISceneSession              ,              options connectionOptions:              UIScene              .              ConnectionOptions              )              {
                          guard              let              windowScene              =              (scene              as              ?              UIWindowScene              )              else              {              return              }

                          let              window              =              UIWindow              (windowScene:              windowScene)
                          window.rootViewController              =              ViewController              (              )              // Your initial view controller.
                          window.              makeKeyAndVisible              (              )
                          self              .window              =              window
                          }
Learn the most up-to-date techniques and strategies for testing new and legacy Swift code in this free practical course for iOS devs who want to become complete Senior iOS Developers.
Save your spot now!
Sponsor sarunw.com and reach thousands of iOS developers.
- Learn how to create a new iOS 12 project in Xcode 11
Read more article about Xcode, Workflow, or see all available topic
Enjoy the read?
If you enjoy this article, you can subscribe to the weekly newsletter.
Every Friday, you'll get a quick recap of all articles and tips posted on this site. No strings attached. Unsubscribe anytime.
Feel free to follow me on Twitter and ask your questions related to this post. Thanks for reading and see you next time.
If you enjoy my writing, please check out my Patreon https://www.patreon.com/sarunw and become my supporter. Sharing the article is also greatly appreciated.
Become a patron Buy me a coffee Tweet Share
Previous
How to create Activity Ring in SwiftUI
A guide to creating an activity-ring-like circular progress bar in SwiftUI. An in-depth tutorial of what I think when making a custom view. At the end of this article, you will be able to create the Activity ring used in the Activity app on Apple Watch.
← Home
How To Create Project In Xcode
Source: https://sarunw.com/posts/how-to-create-new-xcode-project-without-storyboard/
Posted by: woodmanthemarly88.blogspot.com
0 Response to "How To Create Project In Xcode"
Post a Comment